COMMANDLINK DESKTOP QUICK START GUIDE
You can use your CommandLink Desktop softphone client service to make or receive calls from your desk phone, on your PC or Mac.
For your phone service to work on your desktop, you need to install the CommandLink Desktop software. This guide helps you to do that.
SYSTEM REQUIREMENTS
| Component | Requirement |
| Processor | Minimum: Single-core 2GHz or higher
Recommended: Dual-core 2GHz or higher |
| Memory | Minimum: 4GB RAM
Recommended: 8 GB RAM and above |
| Hard Disk Space | 400 MB (Install/Upgrade, 200 MB operation) |
| Operating System | Microsoft Windows 10 (Fall Creators Update or newer required)
Microsoft Windows 11, including version 23H2 macOS 12 (Monterey) macOS 13 (Ventura) macOS 14 (Sonoma) |
| Connection | IP network connection (broadband, LAN, wireless); Constant Internet connection |
| Audio Device | Full duplex, 16-bit or USB headset |
DOWNLOAD AND INSTALL THE SOFTWARE
You can download CommandLink desktop client here:
Windows Download
MacOS Download
LOGIN CREDENTIALS
Login credentials will be provided to you at the time of turn up. If you did not receive or you have misplaced them, please reach out to CommandLink support to retrieve that information at 855-270-5465.
EXPLORE THE COMMANDLINK DESKTOP CLIENT
INTERFACE OVERVIEW
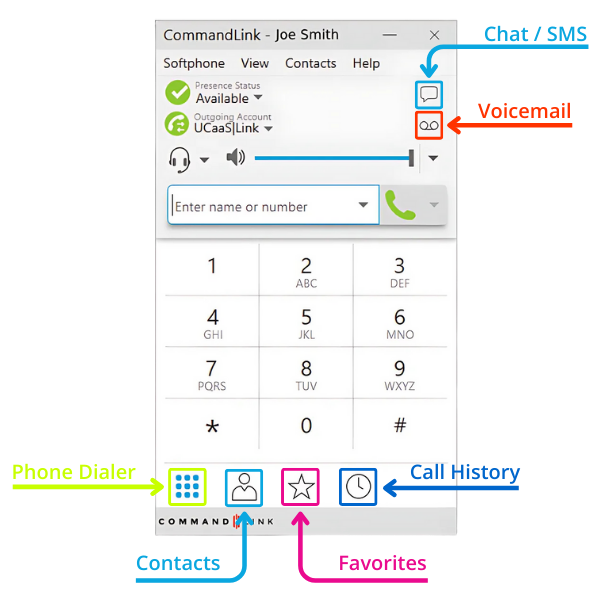
CommandLink Desktop turns your computer into a virtual desk phone. With it, you can make and receive calls, place calls on hold, transfer calls, and set up three-way calls. Additionally, you can send instant messages, send SMS messages, share files, and update presence status with others in your corporate directory who are also using CommandLink Desktop across any device.
 CHAT / SMS
This button opens a new window, allowing you to send IM chat messages as well as SMS text messages to contacts. It provides an interface for quick, text-based communication directly from the softphone.
VOICEMAIL
This icon provides access to your voicemail. Clicking here will allow you to listen to, manage, and delete any saved voicemail messages.
PHONE DIALER
The dialer button opens the main phone keypad, allowing you to manually dial numbers for outgoing calls. This feature provides a standard numeric keypad interface for dialing phone numbers. There are many ways to create calls please see this guide for more information on making calls.
CONTACTS
This button opens your contacts list, allowing for easy access to calling as well as instant messaging. It serves as your digital address book within the softphone.
FAVORITES
The Favorites button shows a list of contacts marked as “favorites” for quick access. Use this feature to store frequently contacted numbers, making it faster to initiate calls or messages.
HOW TO MAKE A CALL
From the CommandLink desktop client there are four different ways to make a call.
METHOD 1 – DIAL PAD
Use the dialer icon in the bottom left of the client. Then use the dial pad to enter the number you wish to call.

METHOD 2 – CONTACT LIST HOVER
Hover over a contact and click on the phone icon.
METHOD 3 – TEXT BOX
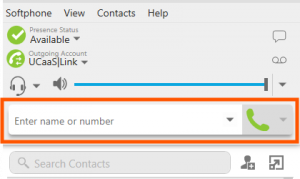
Enter the phone number in the field next to the green phone icon once complete, press enter and your call will begin.
METHOD 4 – RIGHT CLICK CONTACT
Right click on a user from your contacts list and select Call.

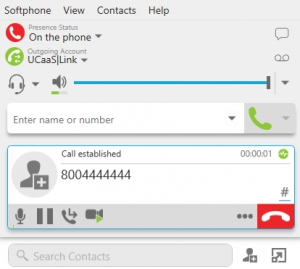
Once your call is made you will see the active in the same window.
TRANSFERRING A CALL
Transferring a call means you are in a call and you want to hand this call over to someone else (the target).
TWO TYPES OF CALL TRANSFER
There are two types of call transfers. A unattended or blind transfer occurs when you transfer a call without talking to the target – the person you are sending the call to. An attended transfer occurs when you talk to the target before transferring the call.
UNATTENDED TRANSFER (BLIND)
In an unattended or blind transfer, you transfer the call to the target without talking to the target first.
Click ![]() Transfer this call (Windows) or
Transfer this call (Windows) or ![]() Transfer (Mac) at the bottom of the call panel. CommandLink Desktop puts the call on hold.
Transfer (Mac) at the bottom of the call panel. CommandLink Desktop puts the call on hold.

Type the name or number of the target, use the redial drop-down list, or drag the target’s contact into the Enter name or number field.

Click Transfer Now

ATTENDED TRANSFER (WARM)
Transfer the call to the target after speaking to the target.
Click ![]() Transfer this call (Windows) or
Transfer this call (Windows) or ![]() Transfer (Mac) at the bottom of the call panel. The call is put on hold.
Transfer (Mac) at the bottom of the call panel. The call is put on hold.

Type the name or number of the target, use the redial drop-down menu, or drag the target’s contact into the Enter name or number field.

Click Call First if it is your default or click the drop-down arrow beside Transfer Now and click Call First.
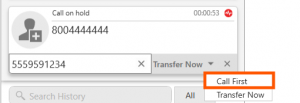
CommandLink Desktop phones the target. When the target answers, Transfer Now is enabled.
Speak to the target. If the target wants to take the call, click Transfer Now (Windows) or ![]() Transfer now (Mac). If the target does not want to take the call, click the X at the bottom of the call panel.
Transfer now (Mac). If the target does not want to take the call, click the X at the bottom of the call panel.
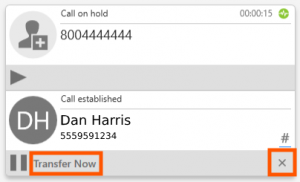
CommandLink Desktop transfers the call to the target if the target accepts the call.
PLACING A CALL ON HOLD/PARK
PLACING A CALL ON HOLD
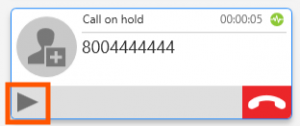
To place a call on hold press the pause button when in an active call.

To resume the call press the play button.
PARKED CALLS
The Call Park feature is a function that allows a user to place an active call on hold in a “park orbit” within the phone system, so that it can be retrieved from another phone or device. To park calls you will need to know what your park orbit numbers are. You can get this information by contacting support at 855-270-5465. Below is an example set of call park orbits.
Park 1 – Orbit 701
Park 2 – Orbit 702
Park 3 – Orbit 703
Park 4 – Orbit 704
PLACE A CALL ON PARK
To place a call on park you will need to be in an active call and then transfer the call to the park (orbit) you wish.
To do so you will dial the park feature code(*13) + the park orbit.
Example: *13701
RETRIEVE A PARKED CALL
To retrieve a parked call you will dial the following feature code(*14) + the park orbit.
Example: *14701
ADDING PARTICIPANTS TO AN ESTABLISHED CALL
You can use the ![]() More options for handling this call (Windows) or
More options for handling this call (Windows) or ![]() More options (Mac) from an existing one-on-one call or from an existing conference call.
More options (Mac) from an existing one-on-one call or from an existing conference call.
Click ![]() More options for handling this call (Windows) or
More options for handling this call (Windows) or ![]() More options (Mac) and click Invite to Conference Call from an established call.
More options (Mac) and click Invite to Conference Call from an established call.
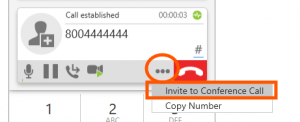
Type a name or a number, use the redial drop-down, or drag a contact into Enter name or number and click Add. CommandLink Desktop adds the new participant.
Repeat these steps until you have added all the participants to the conference call.
CONTACTS
VIEWING CONTACTS
CommandLink Desktop stores your contacts for you. These contacts may include those you have added directly in CommandLink Desktop, contacts synced with your Outlook or G-Suite account, or a designated contact group for your team members. G-Suite contacts are marked with an ![]() identifier for easy recognition.
identifier for easy recognition.
Contacts are organized into groups in the List of Contacts (Windows) or Contacts (Mac), collectively referred to as Contacts. You’ll find a predefined group of your team members. Each contact is displayed with presence information (if available) and icons for quick access to calling and messaging.
Please note that presence and messaging features are not available for G-Suite contacts.
If the Contacts or Favorites tabs are not visible, you can enable them by selecting Show Contacts or Show Favorites from the View menu.
CONTACT FLYOUTS
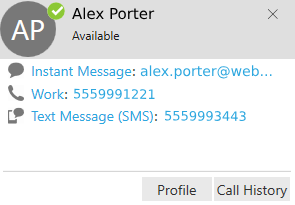
In Contacts or Favorites, you can open the Contact Info flyout, or open the Contact Profile (Windows) or the Contact Editor (Mac) for more contact details.
IMPORTING CONTACTS
Please visit our contact import guide found here.
INSTANT MESSAGING AND SMS
INSTANT MESSAGING
There are two types of messages in CommandLink Desktop – instant messages (IMs) and chat rooms.
- IMs are messages that you send to an individual team member.
- Chat rooms have multiple members and allow you to send messages to all the members of the room. The messages each member sends are seen by everyone.
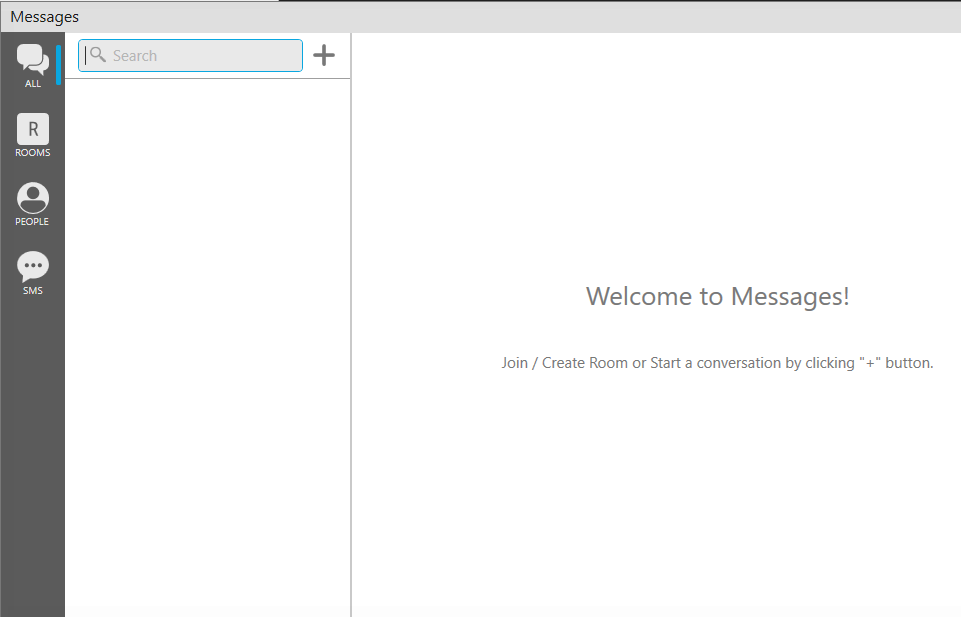
You can see chat rooms with either the All or the Rooms filter selected in the Messages window. You can see IMs with either the All or the People filter selected in the Messages window.
STARTING A CONVERSATION & CREATING A CHAT ROOM
When you are on the All tab of the messaging window click on the plus symbol.

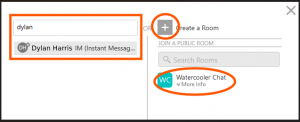
This will bring up a new window providing you with a few different options.
- Create a new IM between you and another person by searching for a persons name or number
- Create a new Chat Room
- Join an existing Chat Room
You can use emoticons and formatting in your IM’s and chat rooms. Use Ctrl+B for bold, Ctrl+I for Italic, and Ctrl+U for underline on Windows. Use Command+B for bold, Command+I for Italic, and Command+U for underline for Mac.
By default, Shift+Enter (for Windows) or Control + Enter (for Mac) inserts a new line in a message and Enter sends the message.
SENDING SMS
The SMS panel can be found in the same window as the IM and Chat rooms.
All SMS messages must lead with a 1 in front of the desired destinations phone number.
Example: If you needed to send an SMS to Bill from accounting, and his number is 555-959-1234, you would send the SMS messages to 1-555-959-1234.

VIEWING CALL HISTORY
All CommandLink Desktop calls are captured in CommandLink Desktop’s List of recent calls (Windows) or History (Mac) – referred to as History. Calls are grouped to easily find all calls from one contact, and can be filtered to make it easier to find a specific call. The most recent 200 calls per SIP account are stored in CommandLink Desktop.
CALL GROUPING
Calls captured in CommandLink Desktop’s history are grouped by name and caller ID. The caller ID can be a phone number or a SIP address, but will be referred to as phone number. The group can be expanded and collapsed to show or hide the individual calls in the group.
If a person has called you from multiple numbers, you may see more than one group of calls for them.
COLLAPSED GROUP DISPLAY
The collapsed group displays an overview of call information: the name and presence status of the caller, the number and types of calls, and the time and date of the most recent call.
![]()
EXPANDED GROUP DISPLAY
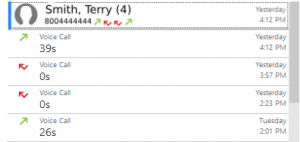
The expanded group shows a list of recent calls between you and the person. The most recent calls are displayed at the top of the list. In addition to the information displayed in the collapsed group, Bria also shows whether the call was voice or video, the time and date, and the length of the call.
SEARCHING HISTORY
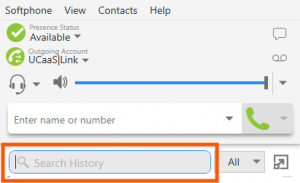
Search for a call in History by either the name of the caller or by their phone number.
